

Try Weglot for free


On the hunt for a Webflow localization alternative that actually keeps up? You’re in good company.
Sure, Webflow’s built-in solution has its perks, but when you need serious translation firepower or workflows that don’t require manual juggling, it can start to feel a little...underwhelming.
That’s why more and more businesses are looking beyond native tools and reaching for options that offer smarter automation, tighter translation control, and the kind of scalability that doesn’t break under pressure.
If you're seeking a comprehensive Webflow tool that offers:
Then exploring Webflow localization alternatives might be your best bet.
In this guide, we'll examine 6 leading solutions to help you choose the perfect fit for your multilingual website needs.
Note: We regularly update this guide with the latest features and pricing, but if something isn't up-to-date, please let us know at [email protected].
When it comes to translating your Webflow site without losing your brand voice (or your sanity), seven standout solutions rise to the top, each taking a distinctly different approach to the multilingual puzzle:
Quick highlights:
Weglot: Automatic content detection translates your entire Webflow site into 110+ languages instantly. Visual editor for manual refinement, dedicated URLs for multilingual SEO, and team collaboration features - managed through one no-code dashboard.
Webflow Localization: The native option. Built with designers in mind, so you get translation tools that play nice with your creative flow.
Transifex: Perfect if you’re after an enterprise-grade translation management platform with serious muscle under the hood.
Lokalise: Comprehensive project management ideal for complex, team-based localization workflows.
Crowdin: Community-driven translation with powerful collaboration features for global teams.
Localazy: Budget-friendly option with robust automation, perfect for smaller sites and startups.
Here's how these webflow localization alternatives compare across key features:
Let's dive into each solution.
We’ll start by looking into Webflow's localization solution.
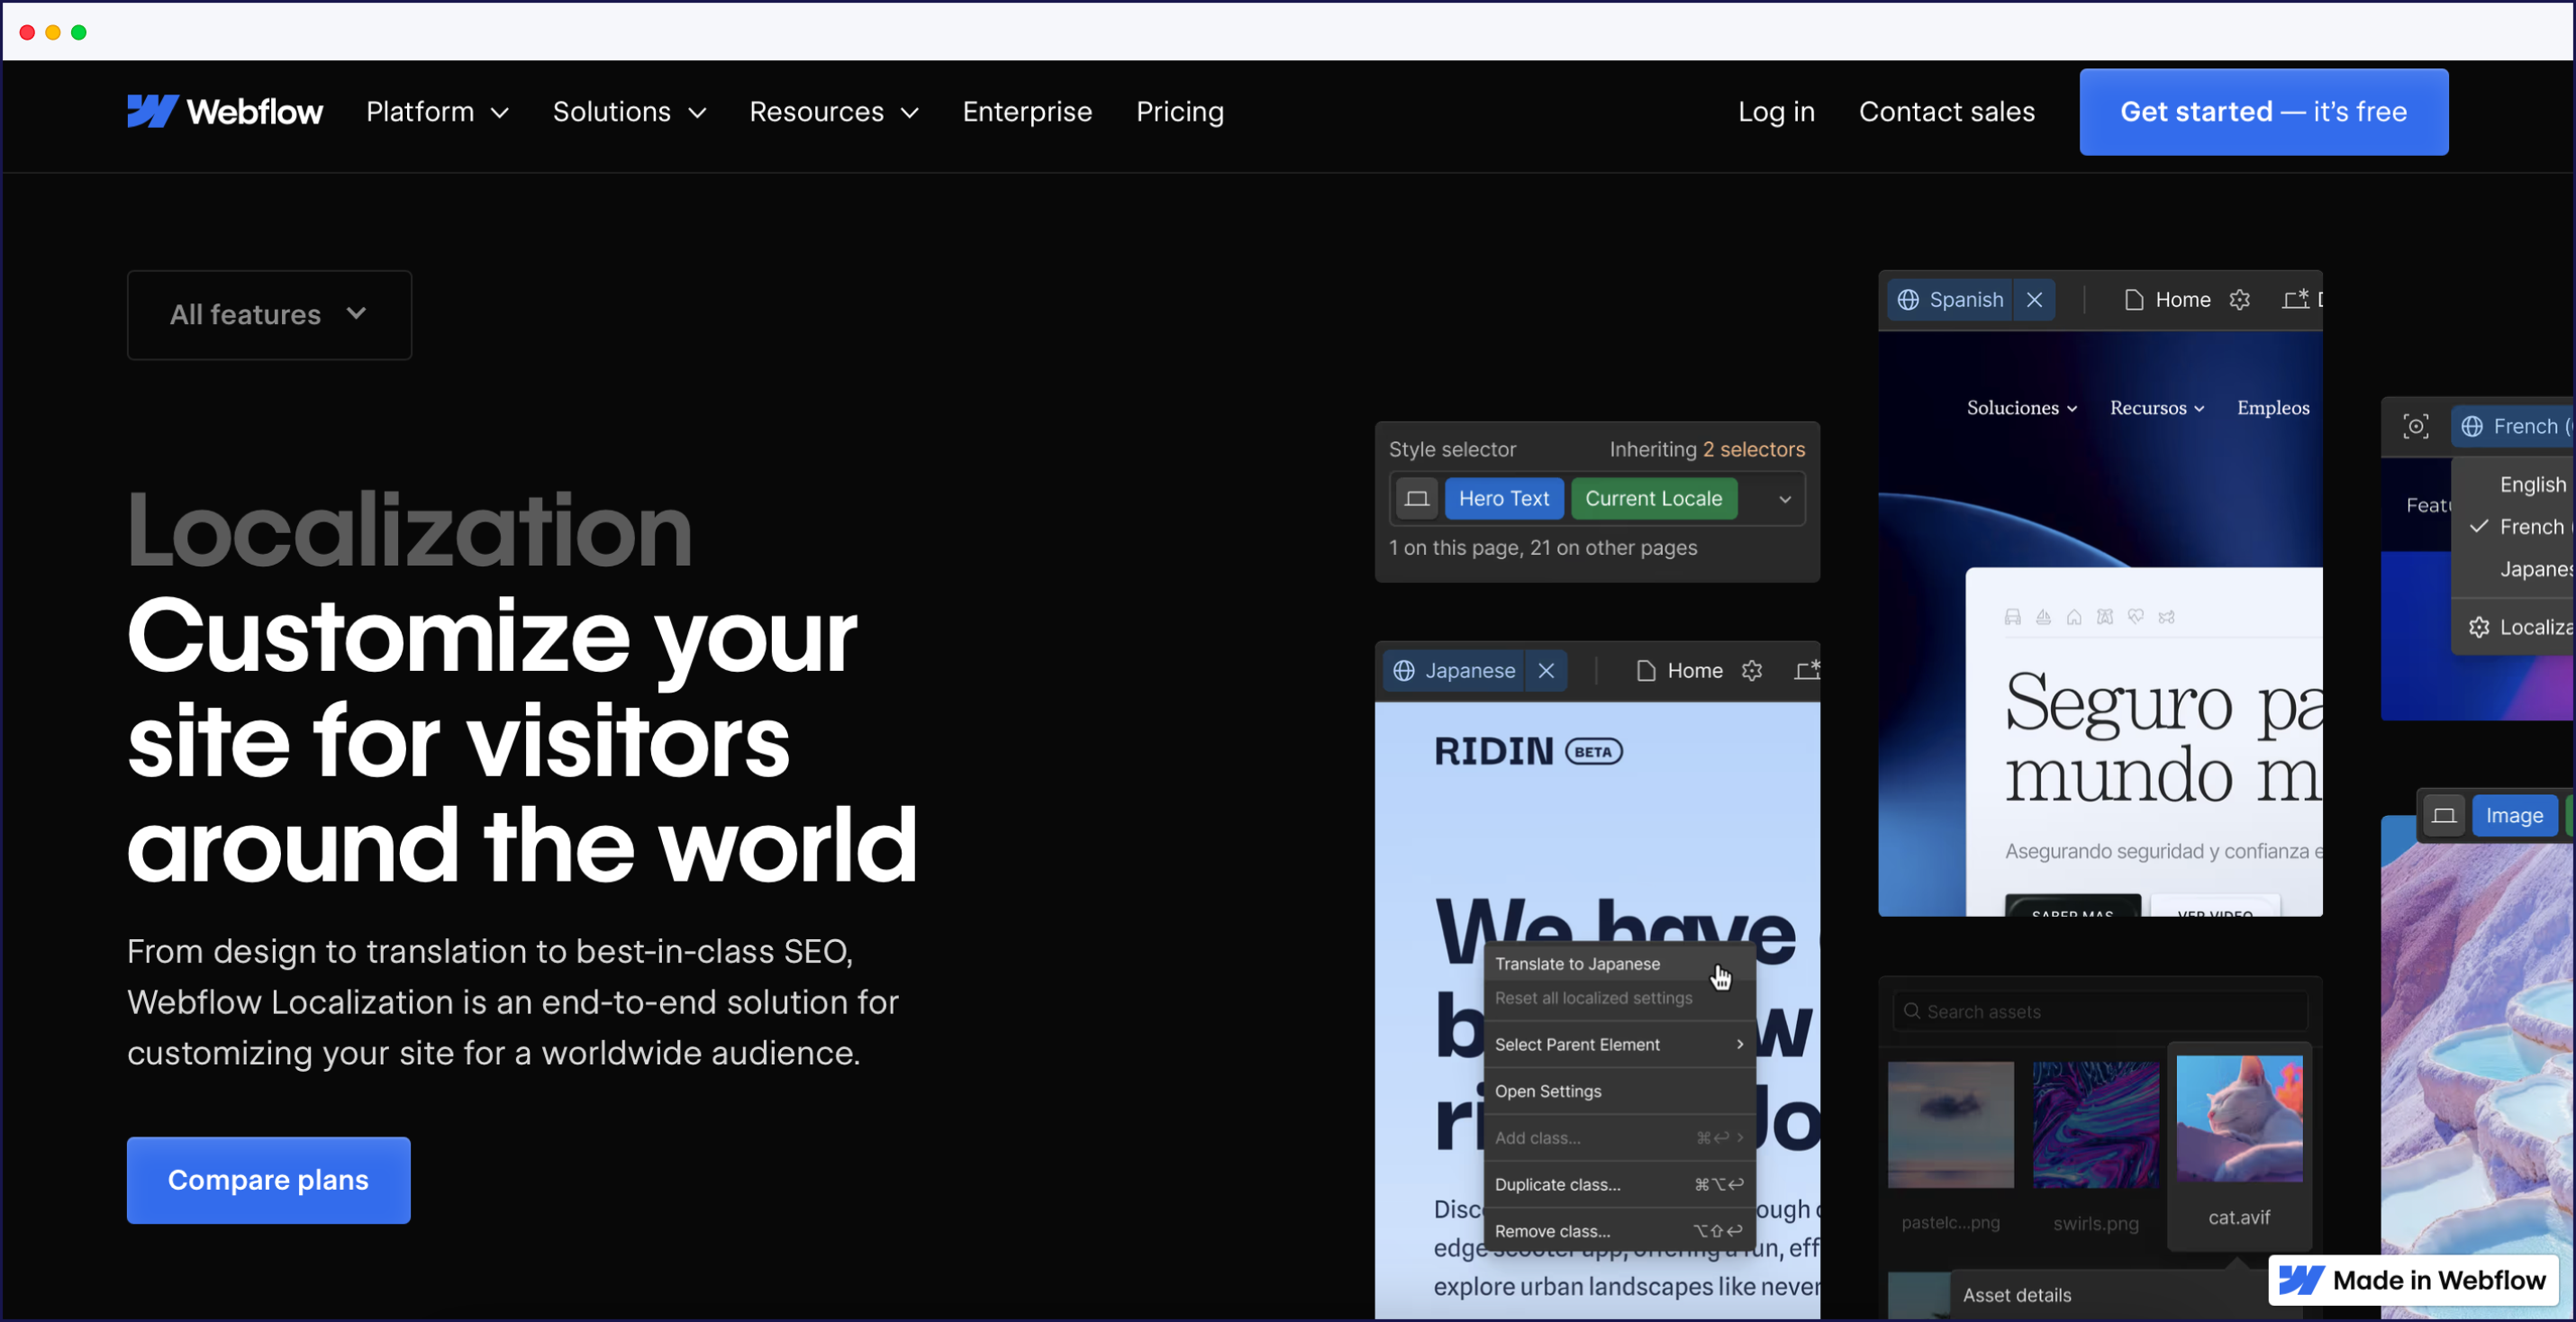
Webflow's native solution aims to provide an end-to-end solution for visually building and customizing your website and optimizing it for a multilingual audience. You can design, build, and localize translated sites directly within the familiar Webflow interface.
Integration couldn't be simpler – everything runs from your existing Webflow dashboard. (For more information, check out the full integration tutorial).
Webflow uses 'locales' instead of 'languages' in their terminology. Your 'primary locale' represents your original site language, while 'secondary locales' are additional language versions.
Semi-automatic translation isn’t as hands-free as it sounds. There’s no magic wand that scans the page and translates everything in one go. Instead, you’ll need to manually click through each element to trigger the translation.
Webflow Localization follows multilingual SEO best practices by adding HTML lang tags, HTML page-level tags, and sitemap hreflang tags to your locales. These signal tosearchengines that your website offers multiple language versions, no duplicate content -akeyfactor when it comes to getting localization right.
Webflow takes care of the techy aspects, auto-adding language codes and HTML lang tags so search engines, browsers, and screen readers know exactly what language they’re dealing with.
You can also manually translate titles and meta descriptions to boost SEO. Plus, Webflow auto-routes visitors to the right language version based on their browser. Just note, site-wide routing only comes with Advanced or Enterprise plans.
Webflow starts at $9 per locale monthly. Each pricing tier includes different translation capabilities.
Pricing tiers:
Team collaboration requires additional fees beyond your Webflow plan. Webflow partners with translation management platforms like Phrase ($135/month) for features including translation memory and workflow automation.
Strengths:
Limitations:
Total investment: $9 per locale minimum, plus Webflow hosting and optional tools.
Best for: Design teams wanting native Webflow translation. Enterprise features may exceed requirements for smaller multilingual projects.
Why Weglot stands out as the best Webflow translation tool:
Weglot makes website localization refreshingly painless. It handles everything, from detecting your site’s content, translating it, and publishing those shiny new versions under language-specific subdomains or subdirectories. All from one clean interface. No surprise add-ons.
And that’s where it really sets itself apart from Webflow Localization. With Weglot, you’re not paying extra just to get basic translation management features.
Getting started takes minutes with Weglot's no-code installation. The tool automatically detects and translates your entire site instantly – no manual page-by-page process needed. Choose between subdirectories or subdomains for your multilingual structure.
Translation management offers two interfaces:
Teams collaborate simultaneously on translations. Webflow Localization limits editing to one person at a time through the design editor. Weglot removes this bottleneck.
Language switching flexibility:
Weglot implements multilingual SEO automatically. Every translated page includes hreflang tags, localized metadata, and dedicated URLs. Browser-based language detection redirects visitors to their preferred language version instantly.
The tool preserves your site's performance while managing translations on Weglot's servers. Your original Webflow site remains untouched, reducing risk and complexity.
Free 14-day trial includes all features. Sites under 2,000 words stay free forever. Paid plans start at $17/month.
The main trade-off: Weglot adds to your tech stack rather than living natively in Webflow. This separation actually protects your original site – translation errors won't affect your primary content. Design localization requires CSS knowledge for advanced customization, though most sites won't need this level of control.
{{quote-cta-banner}}
Best For: Teams who want hassle-free automation and hands-on translation management.
“Our company grew rapidly, which means our target markets multiplied faster than expected. The only way to keep them engaged was to localize our website into multiple languages as fast as possible. And Weglot did all of that for us with minimal effort on our part.”
Polina Usynina, Project Lead
Transifex is a heavyweight contender built for enterprises that need their content localized fast, accurately, and with a keen eye on cultural nuance. With support for 450+ languages and AI-powered continuous translation, it’s like hiring a global team of linguists… minus the payroll.
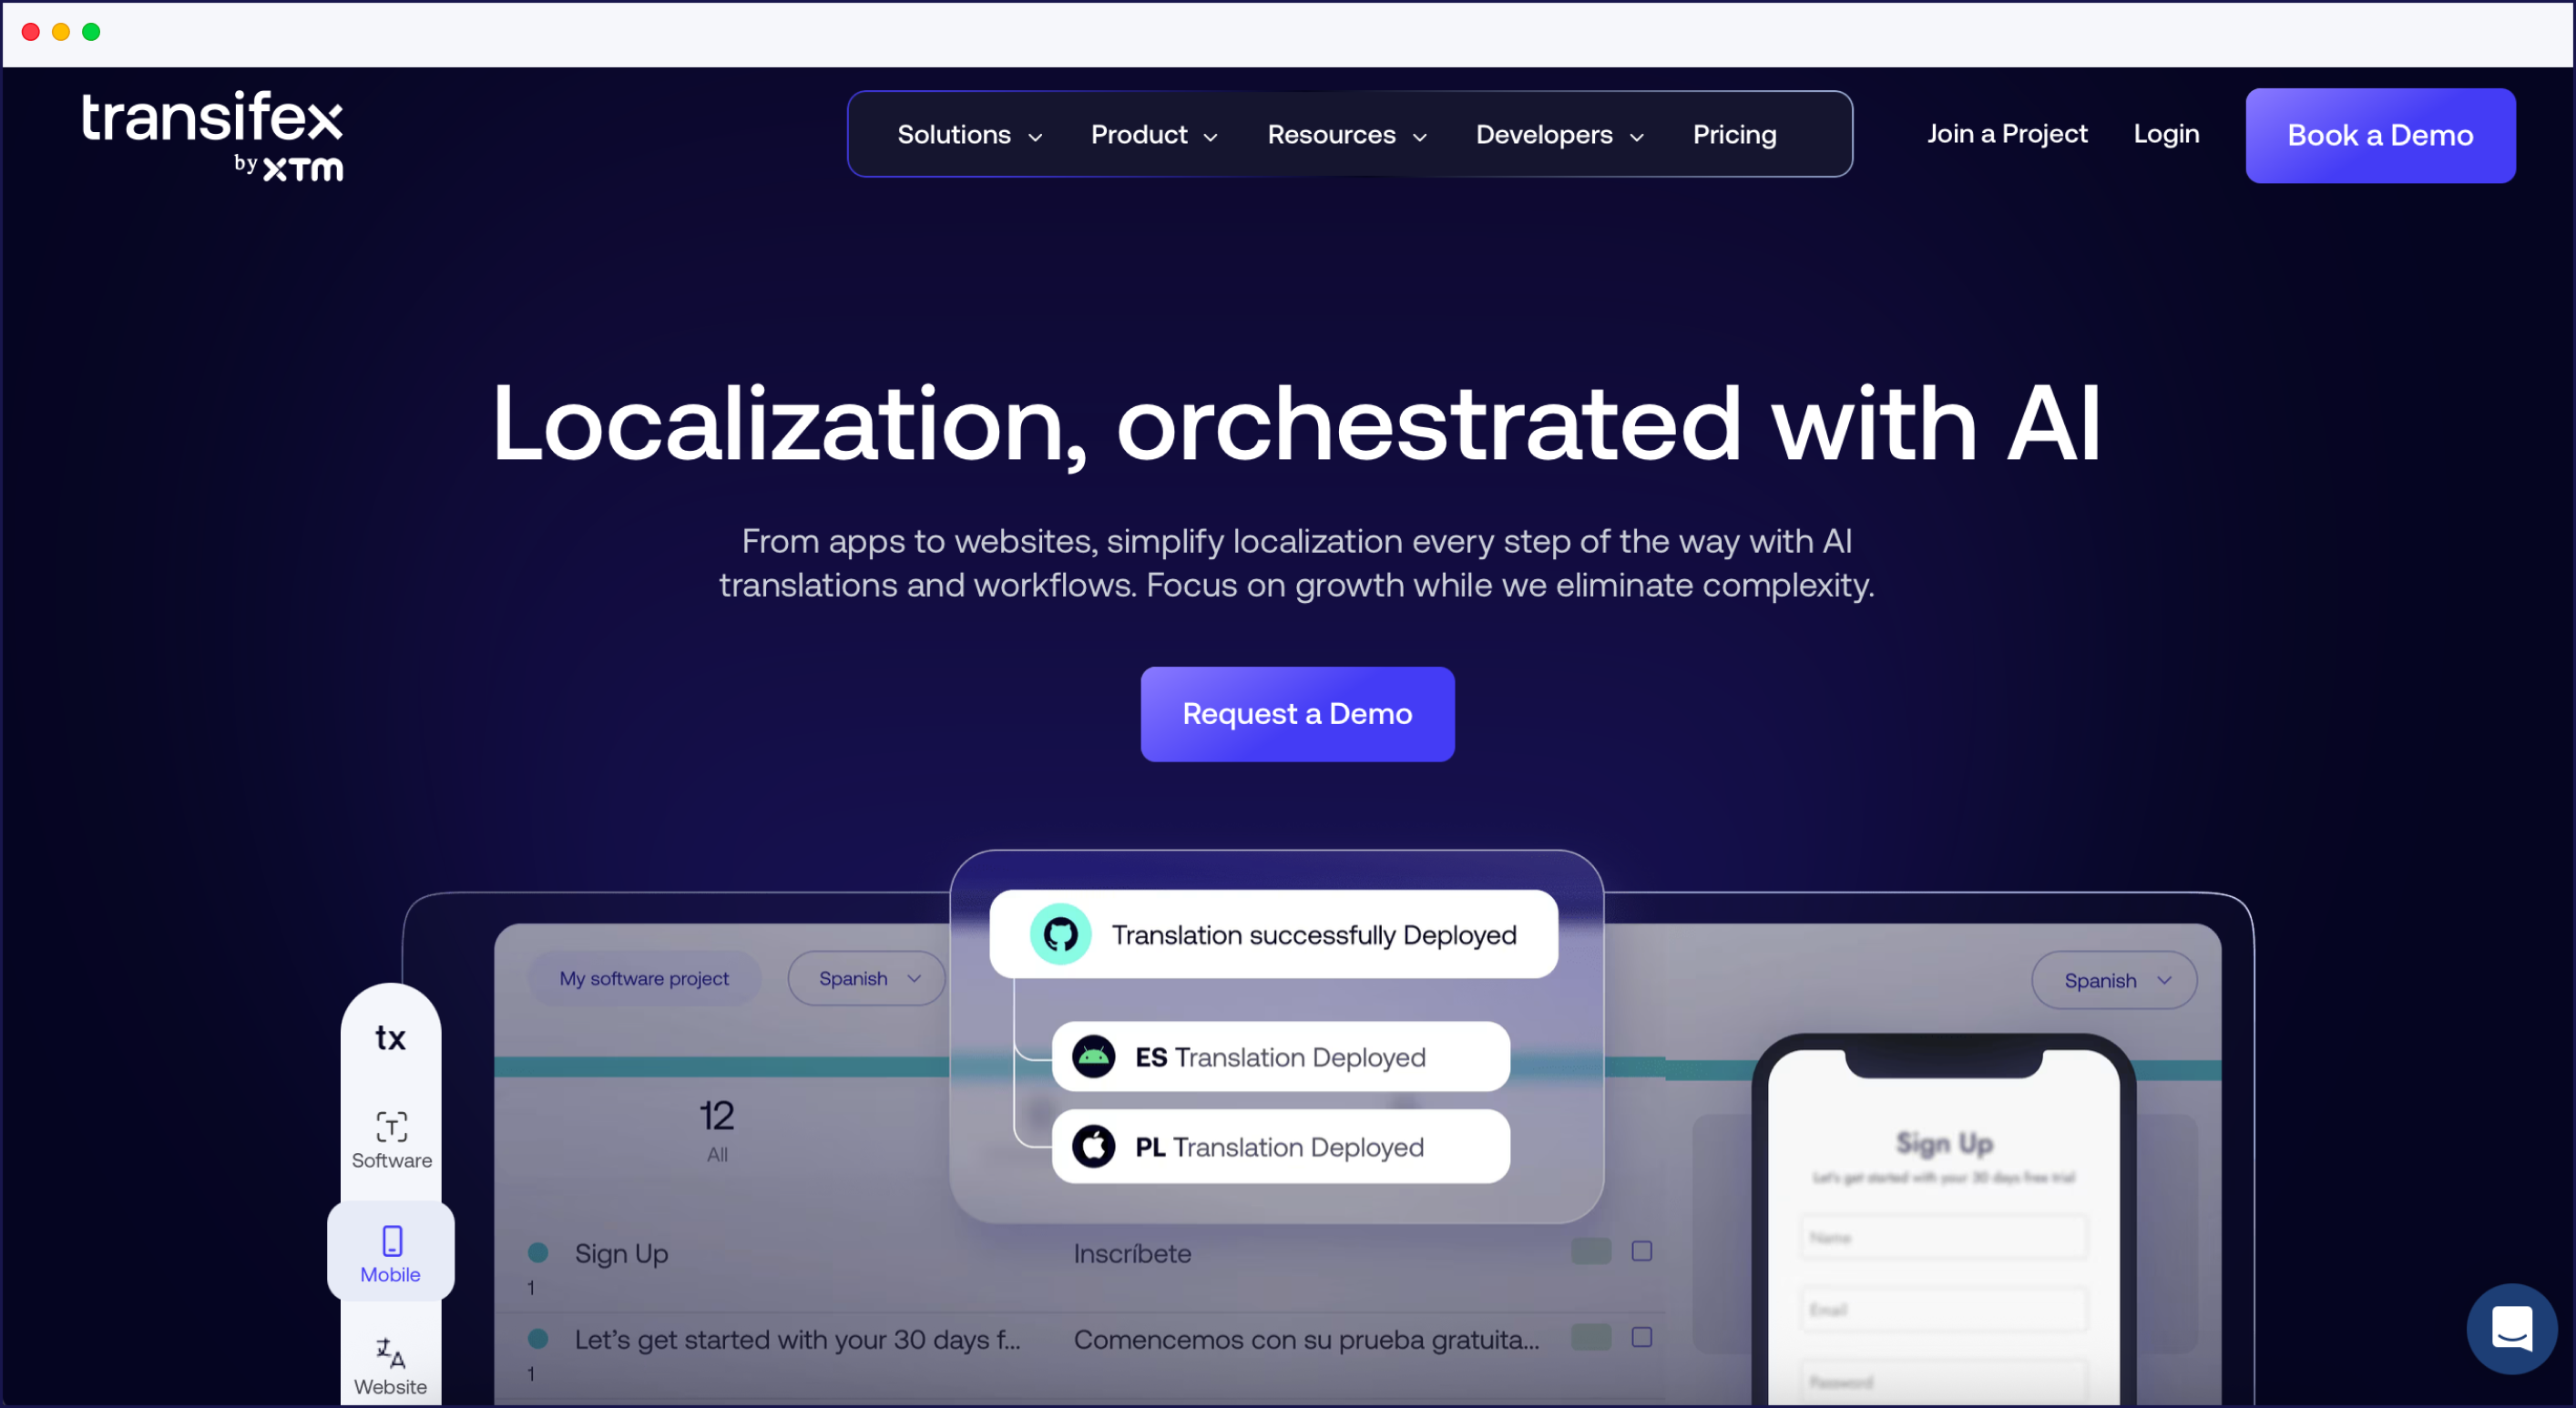
At the heart of it all is Transifex Live: An integration method that uses a JavaScript snippet to weave itself into your site. Set up isn’t simple, but in return you get features worthy of enterprise needs.
Once live, translations happen in context – right there on your actual web pages, with live preview to boot. The CAT Editor streamlines translator workflows so they can skip the messy file dives and just get to work.
It’s built for teams, too. Role-based access lets you invite your in-house people and external language service providers. Plus, Transifex plugs straight into Google, Amazon, DeepL, Microsoft, and KantanMT to provide high quality machine translations.
SEO hasn’t been forgotten. Transifex handles proper URL structures, translates metadata, and gives you tools to stay on search engines’ good side. That said, since it’s JavaScript-based, it can be trickier for bots to index than server-side solutions. So, there’s a tradeoff to weigh.
Every translation is checked against rules to prevent hiccups like broken variables or links.
Aimed squarely at mid-sized and enterprise organizations, plans start at $120/month. Just be aware that word counts can sneak up quickly, especially since Transifex tallies across all languages, whether you’ve translated them yet or not.
Also worth noting: The interface packs a lot of power, but non-technical users might need a few deep breaths (and maybe a walkthrough) to find their footing. Search functionality could be snappier, too.
Strengths:
Limitations:
Best for: Medium to large enterprises with complex workflows, global ambition, and a love for smooth collaboration.
Transifex offers a solid solution for users in search of localization at scale.
“Transifex has helped us scale our localization process efficiently. It offers all the basics of a TMS system.”
Melanie, Localization Manager
Lokalise is a comprehensive offering suited to large organizations and enterprises. Think sprawling content ecosystems, multiple teams, and complex workflows. It’s got the kind of project management muscle that keeps even the most chaotic localization efforts running smoothly.
Lokalise hooks into Webflow via API – so you’ll need a bit of technical lift to get started. But once it’s in place, you get a seriously powerful content operations machine. It handles multiple content types, juggles team roles, and keeps complex projects humming along.
Under the hood, you’ll find:
Teams can work in parallel thanks to branching, comments, and smart approval flows.
Lokalise is no slouch on the SEO front either. It’s got:
Basically, everything you need to keep your multilingual SEO tight and consistent.
Performance-wise? It leans on CDN support and efficient delivery to make sure your global site loads fast – no matter how many languages it speaks.
Instead of charging by word count, Lokalise prices by keys – which can be a win if you’re working with a high-volume or dynamic content setup. There’s flexibility built in to scale with your team size and complexity.
That said, it’s not all sunshine:
Strengths:
Limitations:
Pricing: Plans range from limited free access to $230/month for small to medium sized businesses, with usage based on keys and selected features. Enterprise quotes available on request.
Best For: Agencies and dev teams managing multiple high-stakes localization projects at once.
Crowdin is all about teamwork – built for businesses that want the best of both worlds: Professional-grade translations and crowd-powered contributions. If you're juggling multilingual content with a community twist, this one’s built for you.
Getting started with Crowdin on Webflow is easy. It hooks in via the official app, but there is a catch – you’ll need Webflow’s Localization Subscription Plan first. Once you have that, setup is smooth: Just link your account, sync your content, and you're in.
Multiple translators can work at once, track progress in real-time, and avoid the chaos of version control nightmares. It’s ideal for managing big translation projects without breaking a sweat.
Crowdin also keeps things tidy with built-in quality control: Automated checks, human reviews, and approvals, so only polished translations go live.
Crowdin supports search engine performance with clean URL structures, hreflang tags, and metadata translation – so your multilingual pages show up where and how they should.
Thanks to over-the-air delivery, updates go live instantly. No fiddly file uploads needed.
Crowdin’s pricing is flexible, with free plans for smaller projects and scalable options available. Even better? The Webflow integration is currently free.
Just remember you’ll need that Webflow Localization Plan, which adds to the bill. And if you’re eyeing the more powerful features you’ll need to move onto the higher-tier plans.
Strengths:
Limitations:
Pricing: Free Webflow integration; Crowdin plans start free, with paid tiers as you grow.
Best For: Businesses looking to blend pro translations with community-powered localization.
If you’re on a tight budget Localazy may be the option for you. Built with startups and smaller sites in mind, it offers localization features without the enterprise-sized invoice.
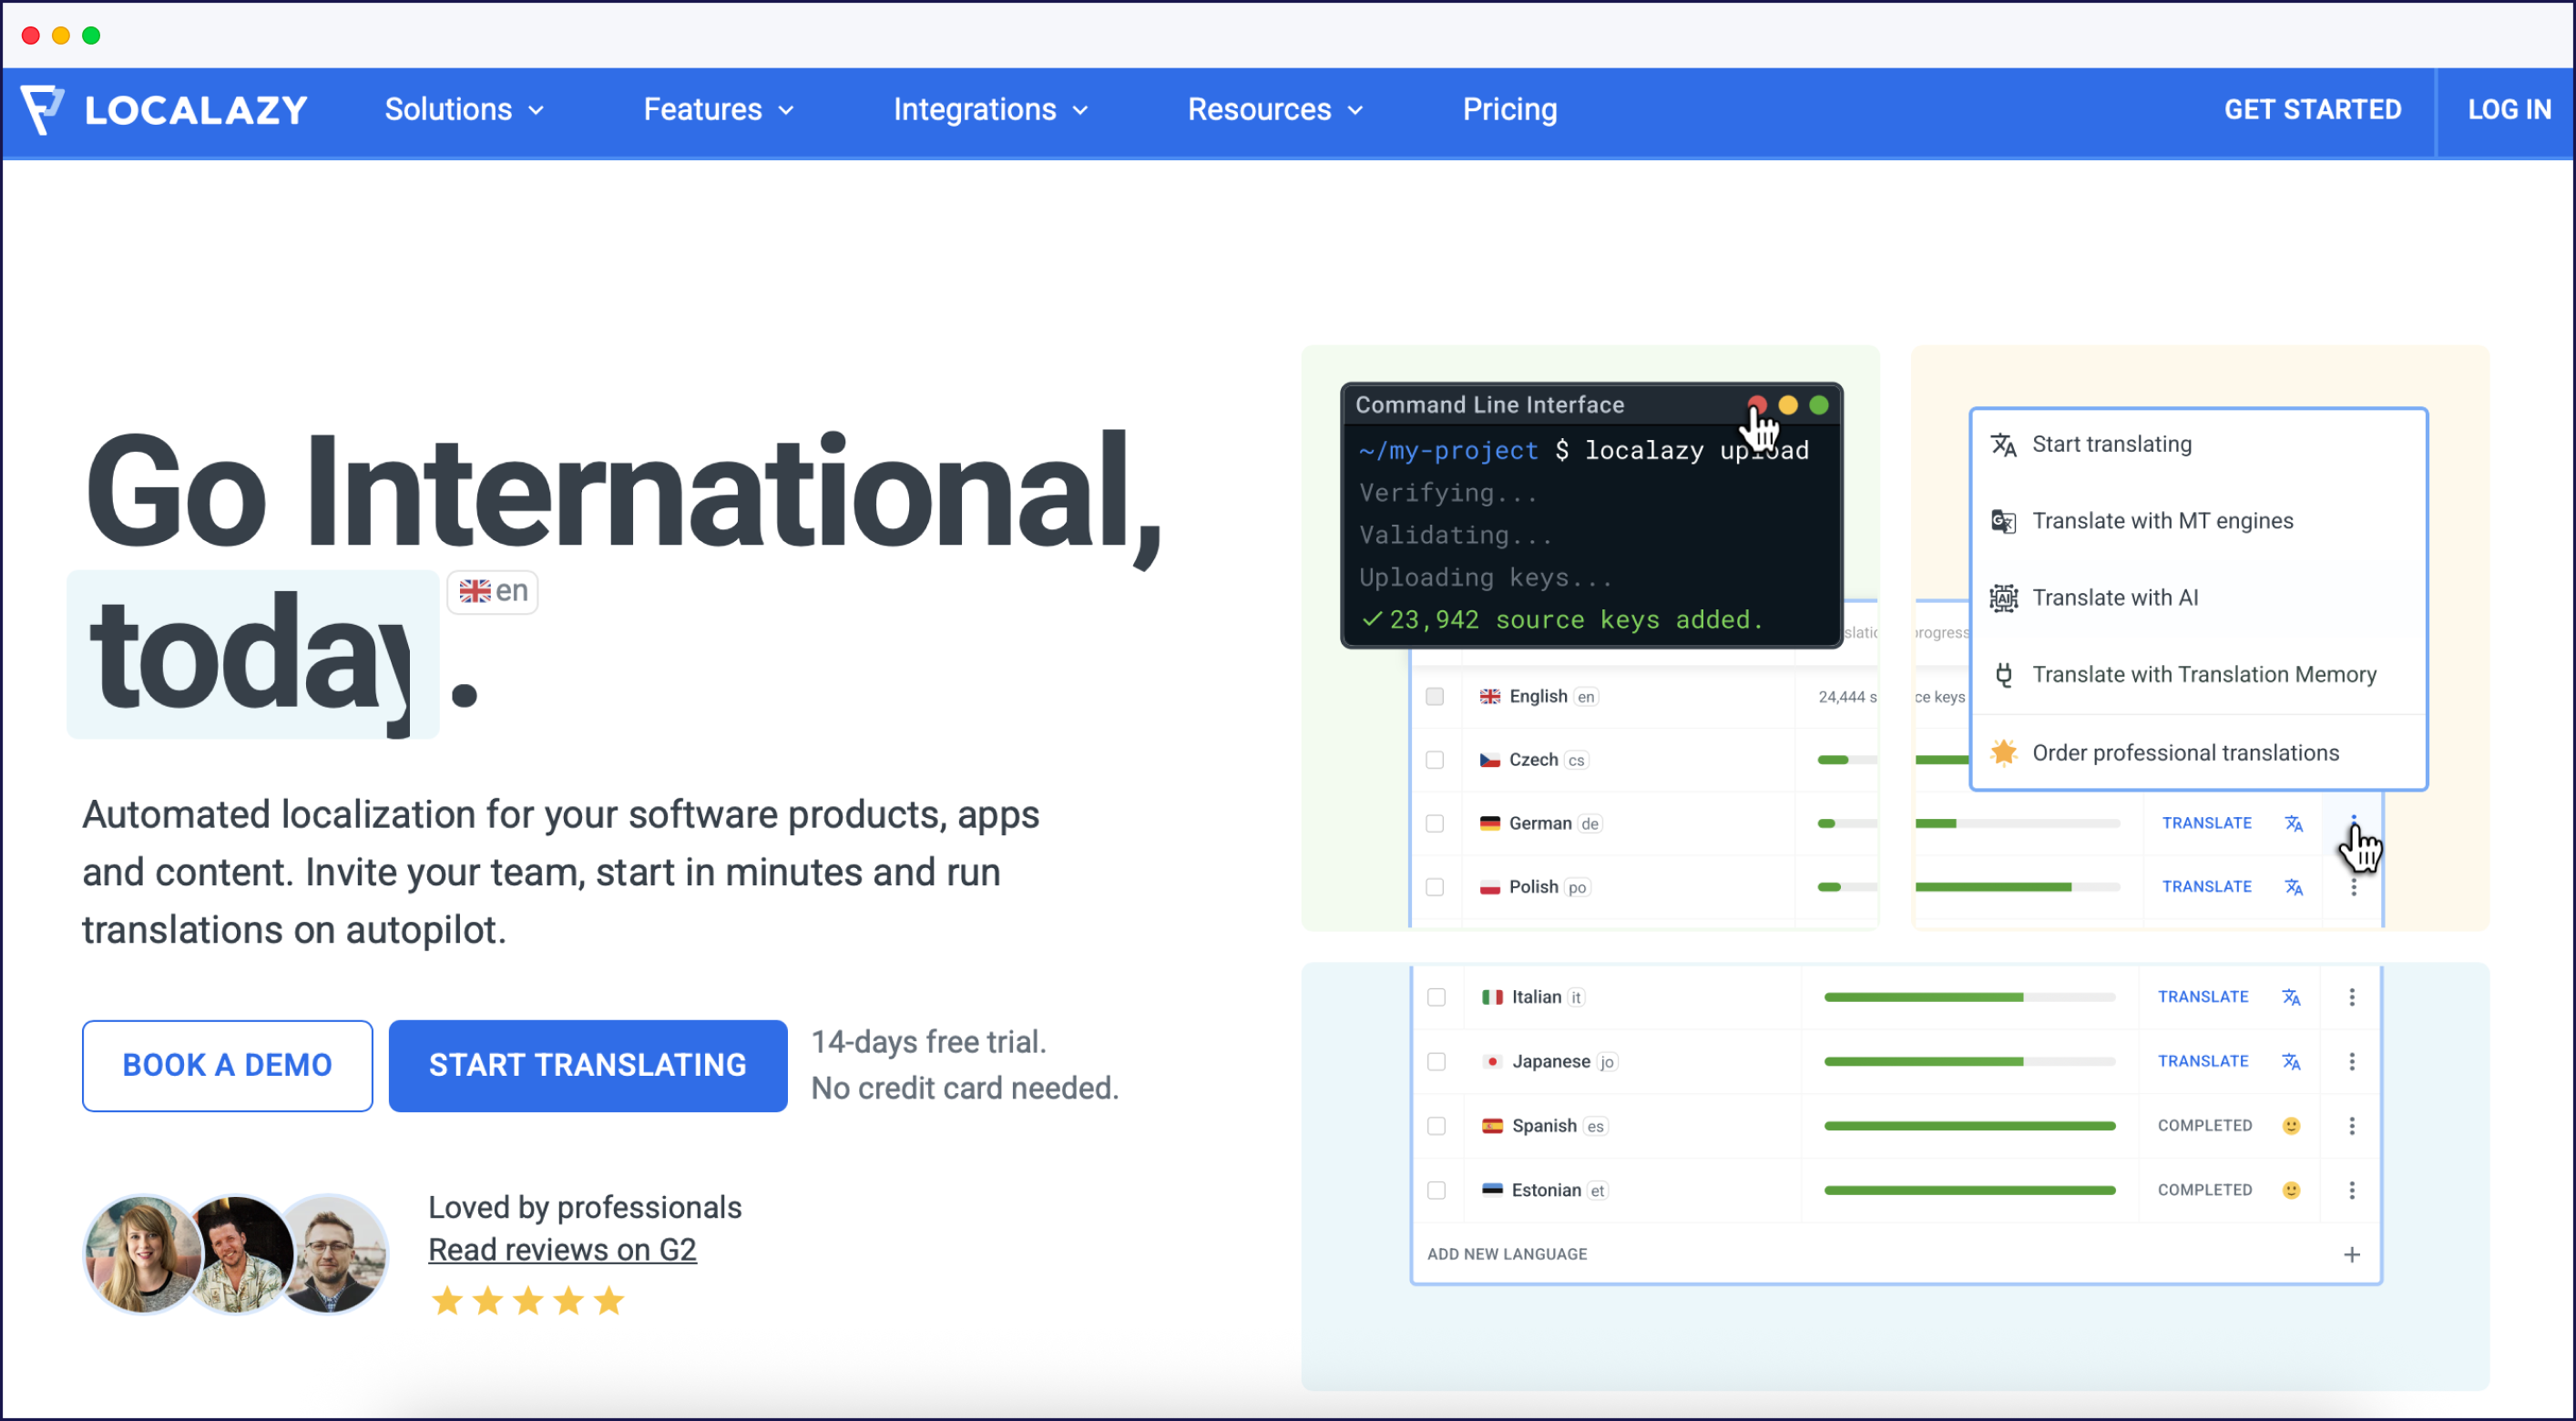
Yes, you’ll need Webflow’s Localization Plan here too, but setup’s easy with Localazy’s own connector. You sync content manually, which means you get control over when and how translations roll out.
The platform lets you mix and match translation methods: Machine-powered or professional translators.
The UI is clean, simple, and blissfully non-intimidating for the less technical.
Localazy checks the SEO boxes with clean URLs, translated metadata, and native Webflow compatibility. It’s built for speed, too, with smart content delivery and handy keyboard shortcuts to keep things moving fast.
Here’s where Localazy shines: Generous free plans and budget-friendly paid tiers. Even better, pricing is based on source keys, not target languages – so go ahead, localize into 30 languages if you want.
The trade-off? If you're planning to scale into complex enterprise setups, you might hit a ceiling.
Strengths:
Limitations:
Pricing: Free tier available; paid plans start low and stay affordable.
Best For: Startups and small businesses who want pro-level translation without the eye-watering costs.
The bottom line: When comparing Webflow multilingual plugins and localization alternatives, Weglot consistently delivers the most comprehensive, user-friendly solution.
Weglot gives you full website translation and precise translation management, all centralized in one dashboard:
When evaluating Webflow localization alternatives, consider these factors:
Budget and scalability: Weglot keeps pricing straightforward. You won’t run into surprise charges for extra users or features. With Webflow Localization, costs can escalate quickly once you start adding on tools or team members.
Translation workflow: For automated content detection and translation, Weglot is the more efficient option. Webflow requires a manual, page-by-page setup that takes significantly more time.
Team collaboration: Weglot’s dedicated dashboard makes it easy for multiple team members to contribute at once. In contrast, Webflow limits editing to one person at a time, which can slow progress.
Technical requirements: Weglot integrates with Webflow in just a few clicks – no coding needed – and works easily with your existing designs.
Don't let language barriers limit your business growth. With over 110,000 global brands already using our tool, Weglot has proven itself as the most reliable Webflow localization alternative.
Weglot was built to be an easy-to-use, intuitive website translation solution with a simpler interface that works with any technology—making it a perfect match for Webflow.
Whether you want the full suite of collaborative features, complete control over your translations and their quality, an easy way to manage your localized website, or 1-click website translation, Weglot is for you.
Each of our plans is tailored to different needs: the number of sites you want to localize, the languages you want to localize them in, and more. Plus, every feature is available within that plan—no need to purchase additional seats or locales to enjoy a fully localized experience.
Start your multilingual journey today:
Try Weglot for free for 14 days, no commitment, and you’ll see just how easy it is to localize your Webflow website in minutes.
Questions about implementation? Check out our comprehensive Webflow integration guide or contact our support team for personalized assistance.

Translate your website instantly with AI, refine with human edits, and go live in minutes.
Trusted by 70,000+ global brands


The best way to understand the power of Weglot is to see it for yourself. Test it for free and without any engagement.
A demo website is available in your dashboard if you’re not ready to connect your website yet.


